Showing posts with label Photo edited. Show all posts

Tuesday, January 25, 2011

Creme Brulee

CREME BRULEE

original

final
           -----------------------------------------------------------------

1. file > open  , choose the file
2. right click on the layer > choose duplicate layer > rename layer (sharpen tool ) > select sharpen tool  ( to sharpen the creme brulee to make it looks clearer )
3. duplicate layer > rename layer ( Gaussian blur ) > select magnetic lasso tool
4. use magnetic lasso tool to select the background ( a selection appear )
5. select > modify > feather 
6. feather radius ( 5 pixels )
7. filter > blur > gaussian blur ( to make the background blur )
8. radius 6.0 pixels
9. adjustments > brightness/contrast > brightness 0 , contrast 30 ( to enhance the colour of the picture )
10. duplicate layer > rename layer ( burn tool ) > select burn tool > opacity 50 % > range ( midtones) ( burn the dark area of the cream  which in the red circle to make it more darker )
11. duplicate layer > rename layer ( dodge tool ) > select dodge tool > opacity 34% > range (highlights) ( apply it on the cream which in the red circle to highlight the cream )
12. duplicate layer > rename layer ( gradient tool ) > select gradient tool > foreground colour ( black ) > press shift ( to make a straight line) + drag it on the background so the creme brulee will be the main focus
13. file > place the bokeh picture at the top left position > blend mode ( vivid light ) > opacity 100% , fill  62%  ( to add texture on the background )


   14. layer > layer mask > hide all 
15. select dodge tool > apply it on the position which the bokeh picture is placed until the texture appear ( to make sure only the wanted part is shown ) 
16. file > place the bokeh texture at top right position > edit > transform > flip horizontal > repeat the steps 14 & 15
17. filter > render > lens flare > adjust the flare center > brightness 120% > lens type 50-300mm
18. file > place > white dotted picture > place at  left side > blend mode (overlay) ( add effect to avoid the dark area looks dull ) 


19. right click on the layer > select rasterize layer
20. select eraser tool > erase the edges of the picture which in the red circle


final


Blogger Templates

Friday, November 5, 2010

Clone Stamp Tool

Clone Stamp tool - What the clone tool does is take one section of the image and clone (copy) it to another area.It can be used to remove dust spots, wrinkles and just about anything that you want out of the image.

BEFORE
AFTER ( add snowflake )
AFTER (remove snowflake)


1. FILE > OPEN

2. choose the file you want to edit

3. right click on the blue highlighted layer, select duplicate layer
4. rename your duplicate layer
5. select clone stamp tool
6. you can choose the diameter of the brush and hardness by dragging the little slider .
7. Hold the tool over the snowflake and hold the Alt key. Holding the Alt key samples the snowflake you are using as the original. then move the tool over to an area that you want to add. left click and hold while clicking the mouse. You should see a clone of the snowflake appear.
8. you can also remove the snowflake. repeat step 7 by sampling the blue area and then copy over the another snowflake which you want to remove it.

Thursday, November 4, 2010

Marquee Tool

Marquee tool - to select areas of image (or the whole image) so that can edit or modify that area. It can also be used for copying sections from one part of the image to the other. Also, the marquee tool has a flyout so you can choose different shapes. right click on the marquee tool & the flyout will be shown
Rectangular - creates a rectangular shaped selection

Elliptical - creates a circular or elliptical shaped selection

Single row - creates a selection that is one pixel high across the width of the image

Single column - creates a selection that is one pixel wide across the width of the image


1. Duplicate 
1. FILE > OPEN
2. choose file
3. right click on the blue highlighted layer , select duplicate layer

4. rename the layer
5. select Elliptical Marquee Tool (right click on the tool)
6. select the area that you want


7. then hold the Ctrl and Alt keys while pressing the left mouse button on the selected area. as you move your mouse, the selected area will be copied  to where you move it.

8.  FILE > SAVE AS , rename your file and choose the file format you want to save.
* remember to save as photoshop (PSD, PDD)


2. Cut and move - select an area, place your mouse inside the marquee. Hold the Ctrl key while holding down the left mouse button. Now move your mouse to move the marquee. the area selected will move and the background color will fill the formerly selected area.

3. Delete - with a marquee selection made, press the Delete key on your keyboard. This will erase the selected part of the image and replace it with the background color.

4. Invert the selection - You can select an area of the image, and then invert that selection by holding down Shift+Ctrl+I (or use the menu Select > Invert ). This is useful if you want to modify most of the image, but leave an area untouched. It's easier sometimes to select the small area, and then invert the selection.

6. Deselect - press Ctrl+D to deselect the area.

7. Select the entire image - To select the whole image, you can either use the rectangular marquee around the extents of the image, or press Ctrl+A.

8 . Adding to the selected area - Hold the Shift key and make another marquee selection (a cross hair and + sign) - it will add to the area selected to overlap the first area, or be a new  area.

9. Subtracting from the selected area - Hold the Alt key and make another marquee selection (a cross hair and - sign) - it will subtract from the area selected to overlap the first area.

10. Creating an intersecting selection - Hold the Shift and Alt keys while you are selecting, can select 2 area and the portion that overlaps the 2 will stay selected in the end.


Wednesday, November 3, 2010

Gradient tool

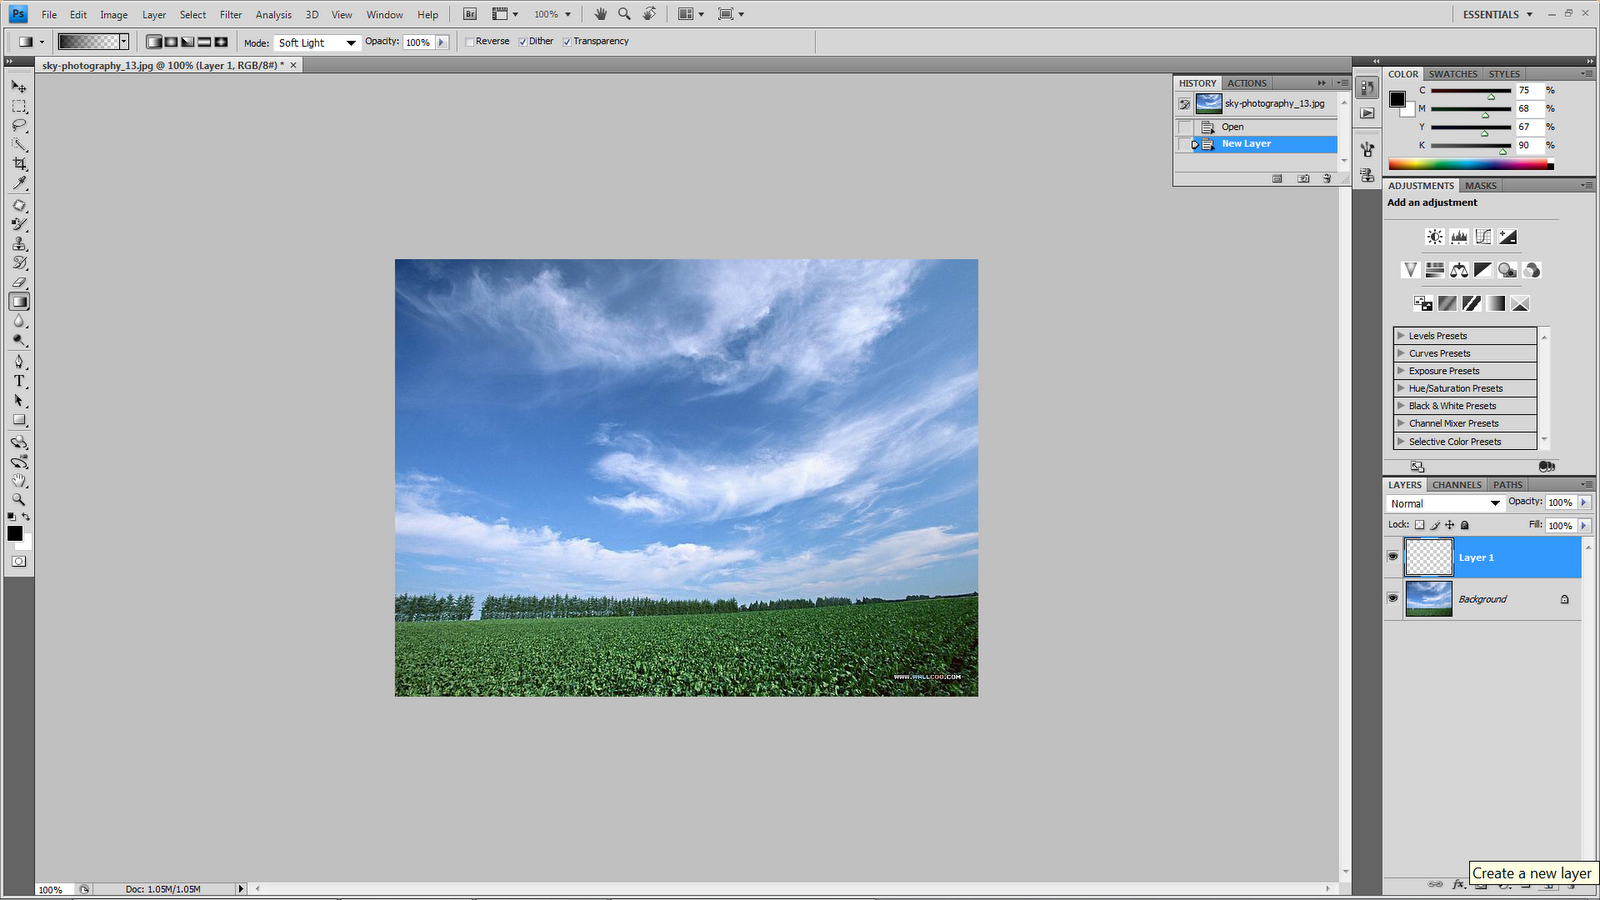
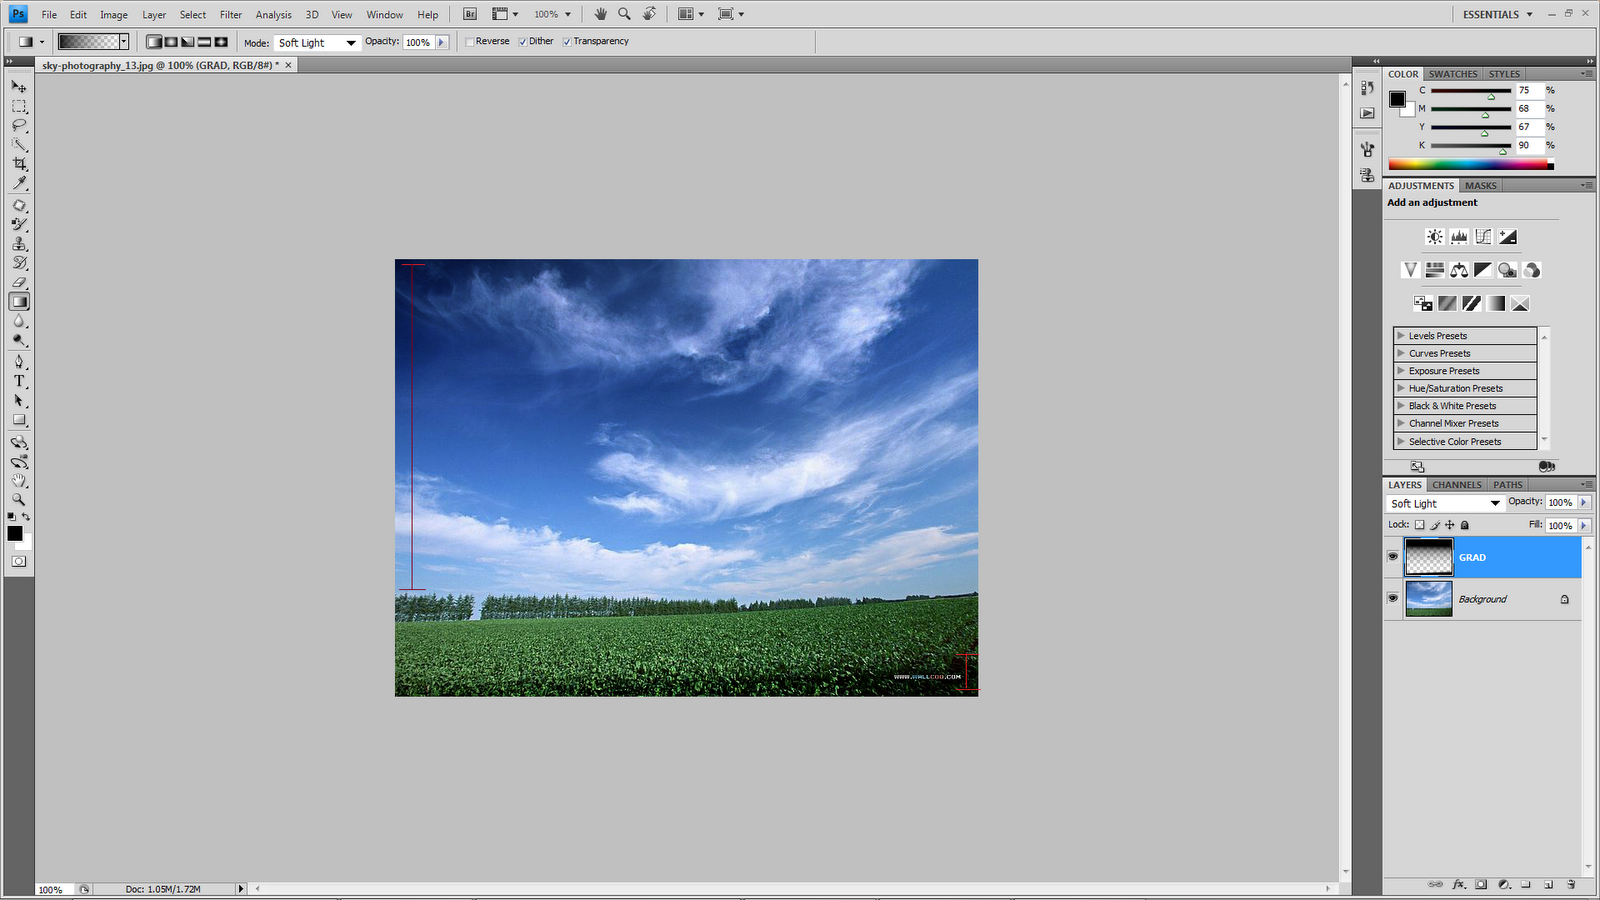
Gradient tool - The gradient tool allows you create a subtle blend of color in an image. This can be as simple as a color fade out to a complex blend of many colors to create a chrome look.

BEFORE
AFTER
1. FILE > OPEN
2.choose the file which you want to edit
3. click the new layer
4. Your new layer should be highlighted(Blue) in the layers pallet on your lower right, and it should be transparent. Photoshop shows transparency as a gray checkerboard
5. rename your layer
6. set the MODE to SOFT LIGHT
7. Select GRADIENT TOOL from the tools palette on the upper left
8. make sure you have the default foreground and background colors, black and white is chosen (two overlapping color squares towards the bottom of the tools palette). You can reset them to default black and white by pressing the tiny little black-and-white pair of overlapping squares next to them, or just press "D" on your keyboard.
9. select the LINEAR GRADIENT which is the first of five little icons on the top middle left of the gradient tool option bar across the top of your screen.
10. select the FOREGROUND TO TRANSPARENT. Choose the one that goes from black to transparent (gray checkerboard).
11. Put your mouse at the top of the image then Click, hold and drag it straight down till reach the position you want then release it . you can make sure it is straight by also holding the Shift key while you do this.
12. FILE > SAVE AS
13. rename your file and choose the file format you want to save
* always remember to save the file as photoshop (PSD,PDD)
back to top